

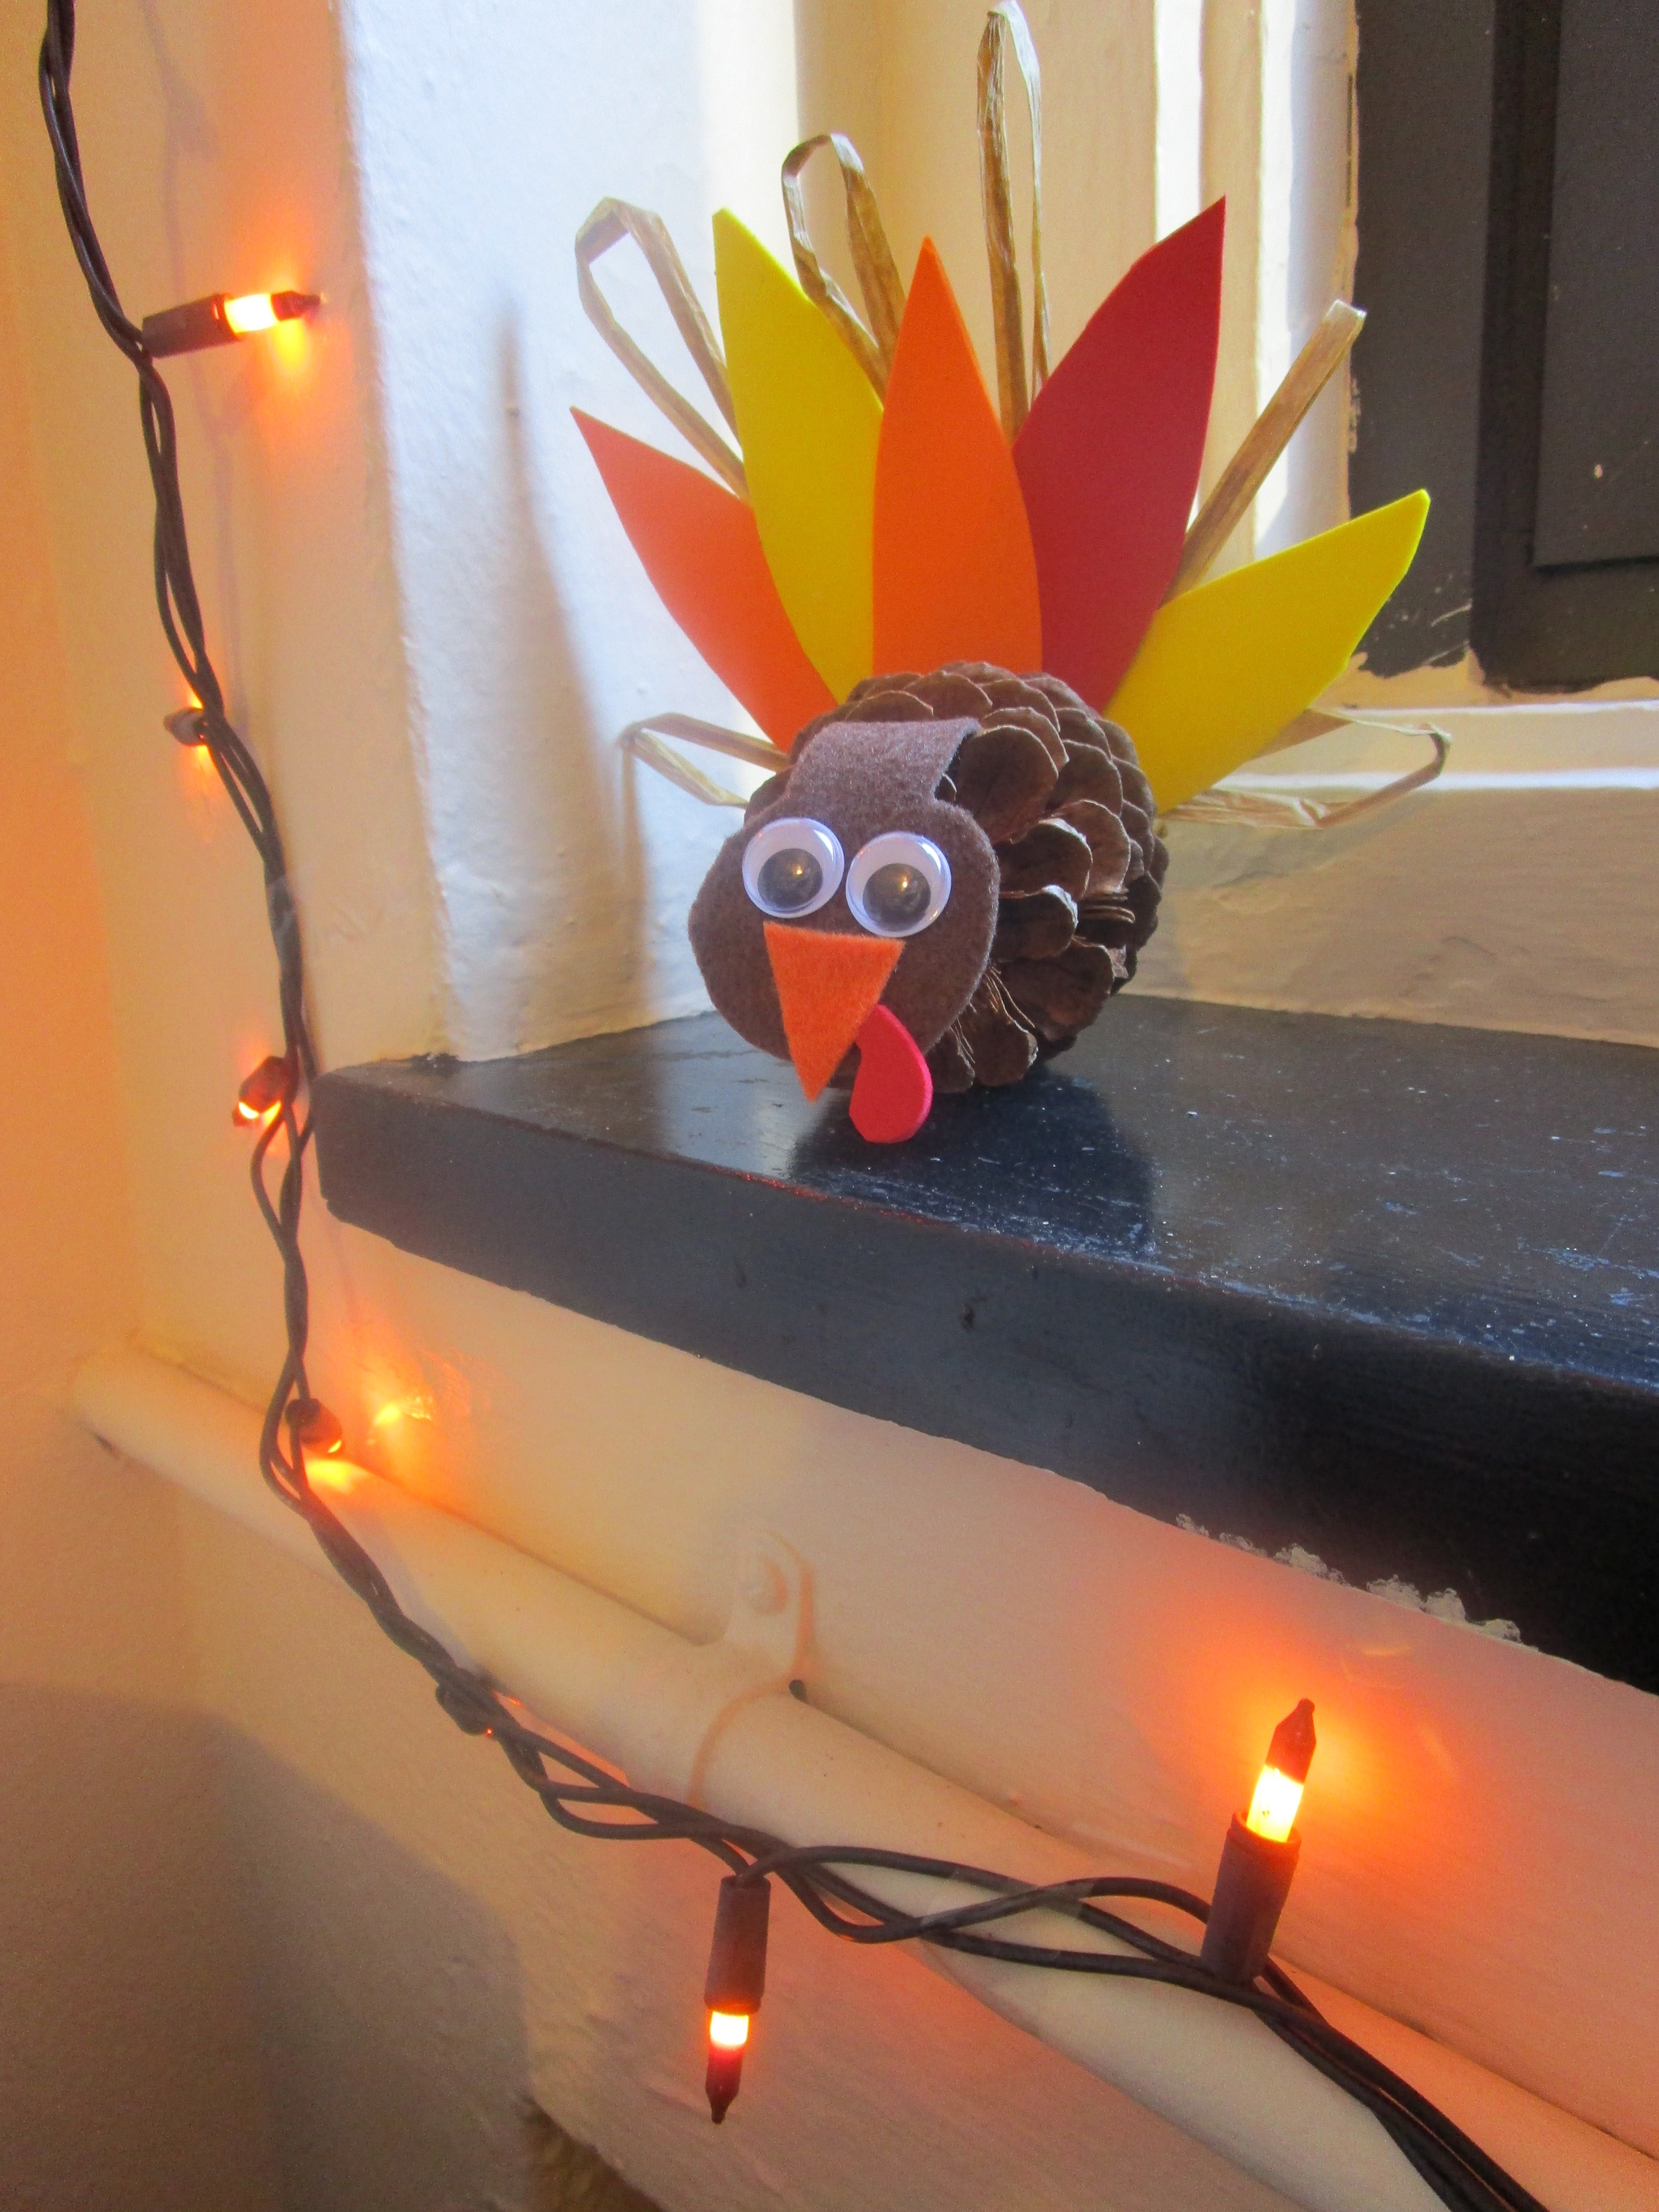
Pinecone Turkey Centerpieces
These turkeys can be used as centerpieces for your host or just as a small decoration for your dorm. For an extra holiday twist, you can use scented pinecones, sold at most craft stores. The pinecones I got were on sale for $3 and the rest of the supplies were about $9. This craft was inspired by designer Lia Griffith’s pinecone turkeys.
Supplies:
- Pinecones
- Brown, red, orange and yellow craft foam or felt
- Googly eyes
- Glue*
- Tail material (feathers, raffia, ribbon scraps, felt, etc.)
*I would highly recommend using hot glue for this project. I was able to use tacky craft glue, but hot glue will make it much easier.

Start with your pinecone. If you picked one up from outside, give it a quick wipe-off with a wet paper towel to remove any dirt that would prevent the glue from sticking and let it dry. Lay the pinecone on its side, and try to find the flattest side as a base so it will stand on its own.
For the head of your turkey, cut out a brown circle with a long rectangle attached for the neck. Cut out a small triangle of orange or yellow from your foam or felt for the beak, as well as a smaller, bean-shaped red piece for the turkey’s gobbler. Attach those pieces to the head, along with the googly eyes.
Glue the head to the pinecone; you’ll want the neck to sit back a few rows on its scales.
Now time for the tail–this can be made out of whatever you think looks better or whatever you have lying around the house! I cut a rough feather shape out of craft foam, and then glued them to the back of the pinecone one at a time. I also added raffia for an extra texture.
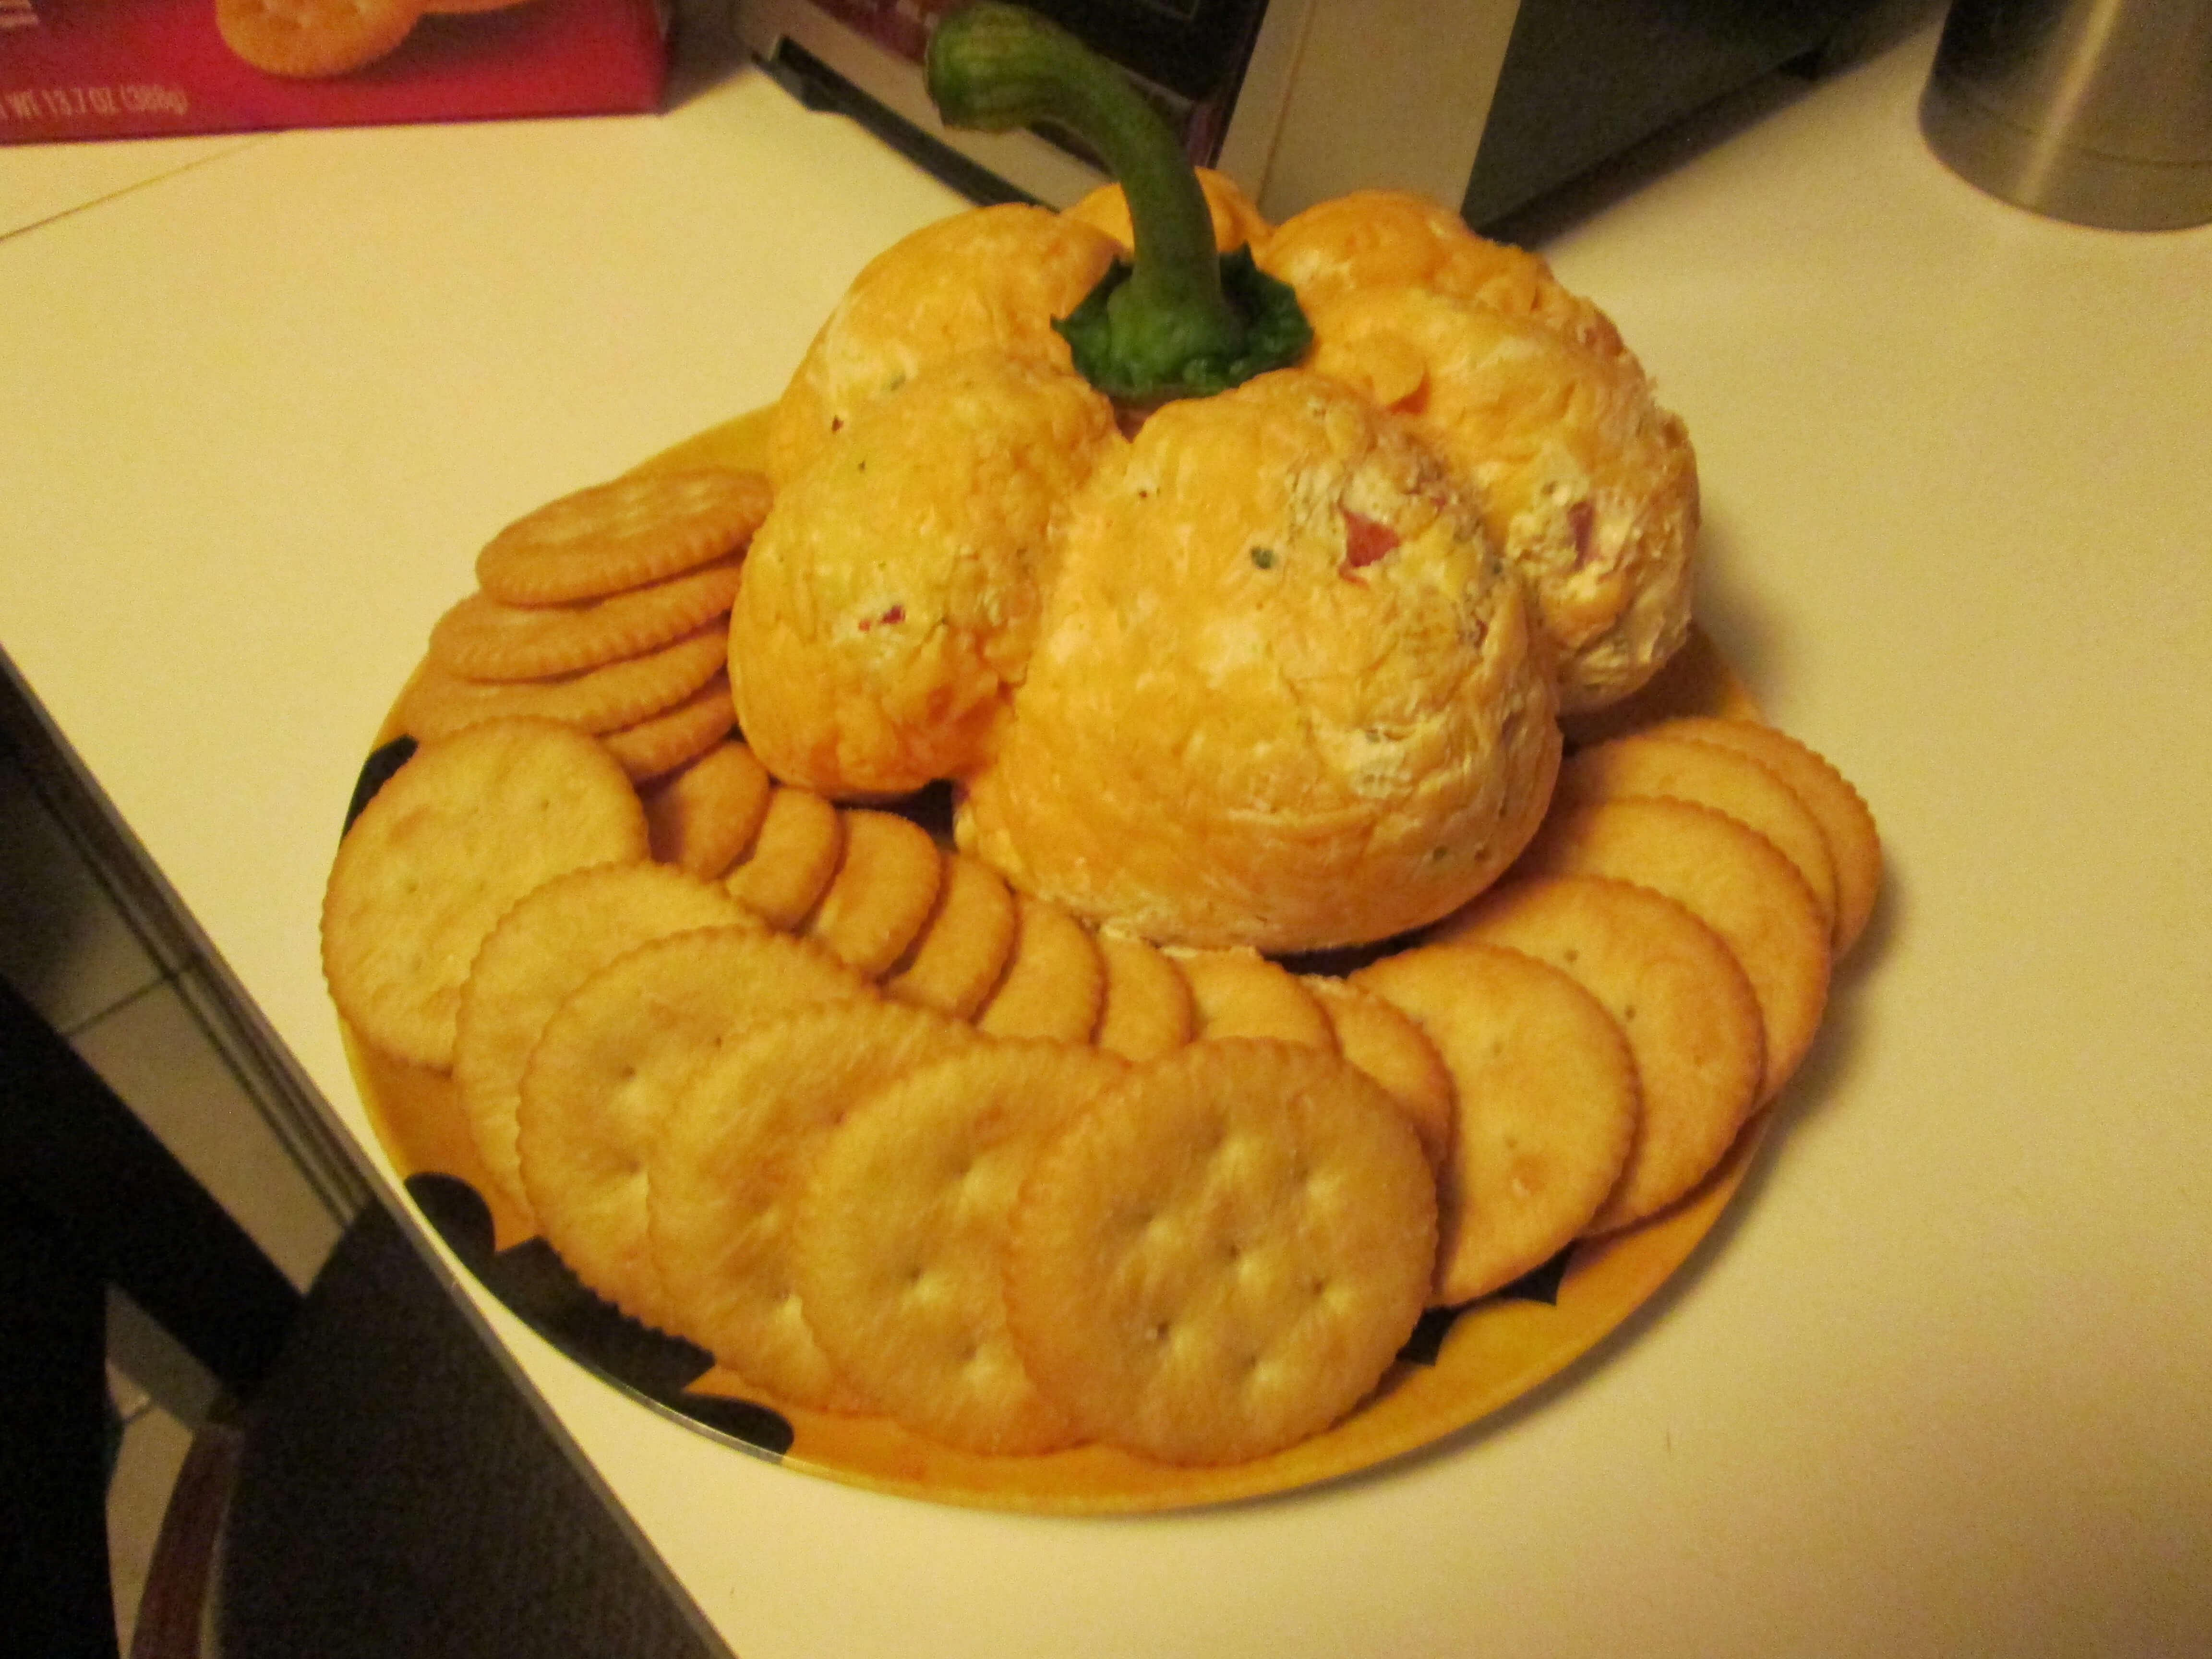
Pumpkin-Shaped Cheese Ball
This was a hit at the party I took it to, and there were still plenty of leftovers afterwards. For all the ingredients and supplies, I spent about $14. I used a recipe from The Country Cook.
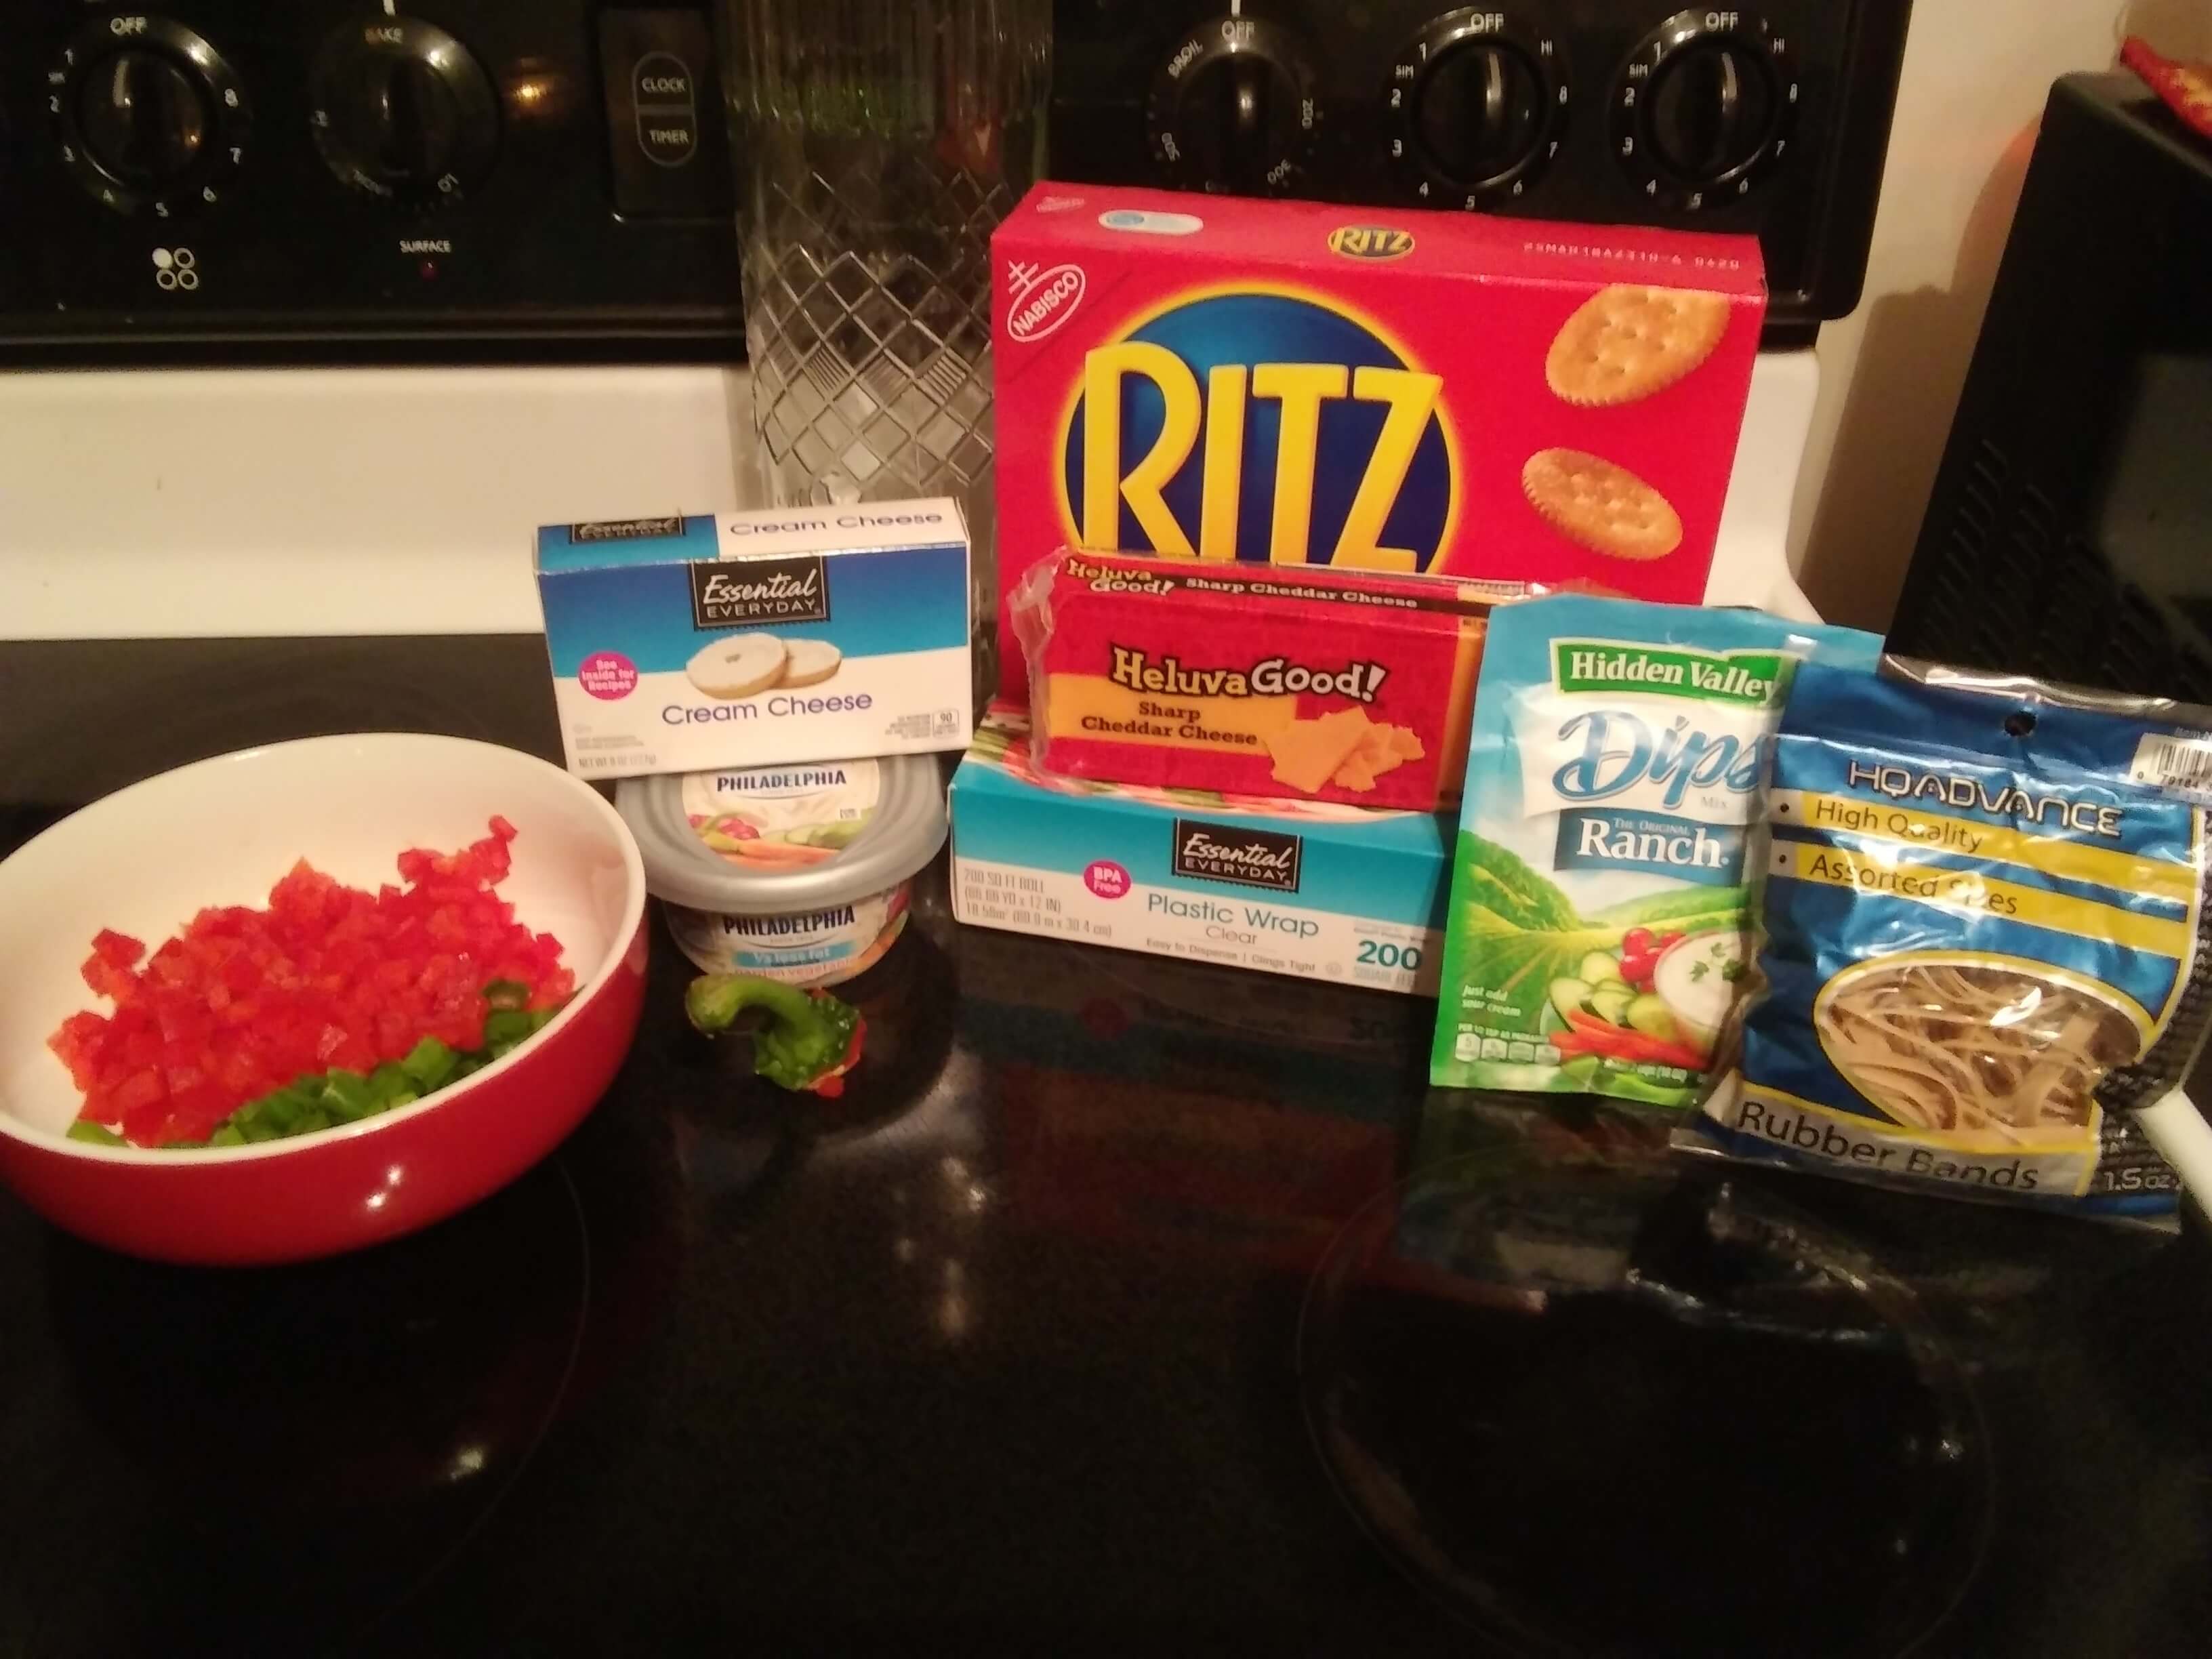
Ingredients:
- 1 red pepper
- 3 green onions
- 8 ounces plain cream cheese
- 8 ounces vegetable cream cheese
- 2 tablespoons ranch dip mix
- A bag or block of cheddar cheese
Other Supplies:
- Plastic wrap
- Rubber bands or cooking twine
Cut up your veggies. Don’t forget to save the stem from the pepper for the top of the pumpkin later. Try to keep the pieces small and thin, but it’s also your preference as to just how small they are! Mix together the two different cream cheeses using a stand mixer. You can hand mix them too, but be prepared to use those muscles. Add in the ranch dip mix. Mix, and then add the pepper, green onion and cheese.
Lay down a small pile of cheese on a layer of plastic wrap. This will act as the base of your pumpkin. Pile your cream cheese mixture on top. Using the plastic wrap, shape it into a ball. Before you finish wrapping it, add cheese to the top and sides of the ball. Wrap the ball in two layers of plastic wrap to avoid it spilling out. Then, taking your rubber bands or twine, wrap or tie around the ball to give it that pumpkin shape. I used three rubber bands.
Place it in the fridge. It is recommended to chill overnight, but I had it in for several hours and it still maintained its shape.
After it’s chilled, cut off the twine or rubber bands and gently unwrap the cheese ball. Place your red pepper stem on top. Serve with crackers of your choice!
Published By: Paige Parise